Pickling is a big food trend these days, but Paula’s been pickling things for ages. We guess she’s just been ahead of the curve! Of course y’all know there’s much more to pickle than cucumbers (of which you can find myriad recipes), so we wanted to share some general tips for pickling your favorite foods.
Picking & Prepping your Produce: Good pickles start with fresh, firm, and blemish-free produce. If it isn’t of a quality that you would eat normally, don’t use it for pickling. Choosing un-waxed fruits and vegetables is also incredibly important, as wax prevents the pickling liquids from penetrating the produce. Before adding your fruits and veggies into your pickling liquid, make sure you wash them thoroughly in running water, scrubbing with a soft vegetable brush to ensure there’s no dirt or sand left on them.
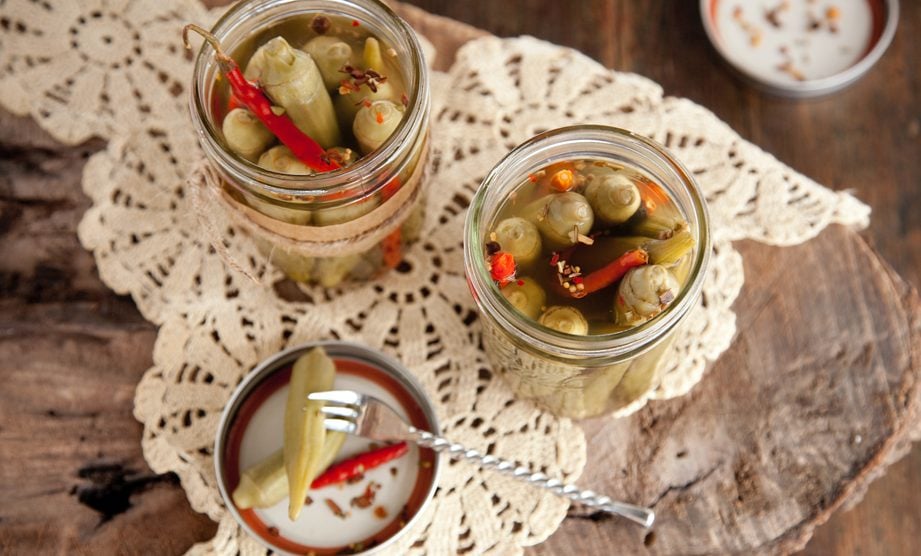
Depending on which veggie you choose, there may be a little more prep-work than simply scrubbing them. When using cucumbers, be sure to remove the blossom and stem (cut about 1/16th an inch off the blossom side), as the enzymes that are released from the blossom can soften the cucumber, and everyone knows crunchy pickles are the best! If you want a crunchy veggie like carrots or okra to be a little softer after the pickling process, you may want to pre-boil them a bit. More delicate vegetables (think cucumbers and zucchinis) should absolutely not be cooked in advance.
If you choose to pickle fruits, use a little less vinegar than you would use for vegetables, and consider selecting one with a lighter flavor, like apple cider vinegar. Firm fruits, like grapes, cherries, and pineapples, tend to work for pickling better than soft fruits and berries.
Choosing Vinegars: Vinegar just may be the most important ingredient when pickling! For pickling, the vinegar must have at least 5% acidity—its high acid content is what makes the pickles safe to eat after the pickling process. You don’t need expensive vinegars to make great pickles—your average distilled white vinegar is going to be the most commonly used vinegar for pickling! Because it’s clear, it won’t change the color of the pickles. Of course, apple cider vinegar, malt vinegar, and red and white wine vinegars are great options too. Just be aware that cider, wine, and malt vinegars can darken the pickles. You can always add in some more unique, more expensive vinegars for flavor subtleties if you like!
We like choosing recipes that have both vinegar and water, as it doesn’t have quite as sharp of a flavor. However, this is very important, but do not dilute the vinegar unless the recipe says to do so. Adding water will change the acidity of the vinegar, which can make the pickles unsafe to eat.
Salt & Sugar Selection: Salt and sugar are two very important ingredients in pickling. Not only does salt help keep harmful bacteria at bay, but it also helps with the flavor of the pickles! Make sure when you’re selecting your salt that you only use pickling salt, which dissolves easily, not table salt. Table salt has many additives that can discolor and change the texture of your pickles; plus, the additives in table salt can result in cloudy pickles.
When choosing sugar, be sure to use exactly the sugar specified. Do not use substitute sugars or sweeteners unless the recipe specifically calls for them. Also, as pickles should be more vinegary and salty than syrupy sweet, try to avoid recipes that call for more than a quarter-cup of sugar.
What Water? Believe it or not, the water you use does matter! Always use distilled or soft water. Hard water can create a discoloration of the pickles and, more importantly, lower the acidity of your brine, which can make your finished product unsafe to eat. If you have hard water in your home, don’t sweat it—you can soften water yourself! Just boil the water, then let it sit for 24 hours. After it has sat, you can skim off any deposits that are on the surface, carefully ladling the water into your pickling container to avoid stirring up any sediment that may be at the bottom of the pot.
Satisfying Spices: Sure—you can technically make pickles with nothing but water, salt, sugar, and vinegar, but that doesn’t mean you should! Pickles are so much better when additional spices and flavors are added. You can always purchase pre-made pickling spice mixes, but we like to make our own. Feel free to experiment using flavor combinations you love or even combinations that just sound interesting and appetizing to you!
We do recommend using fresh, whole spices over using ground, powdered spices though. Those powdered spices can darken your brine and turn it cloudy. Simply add whole spices to a spice bag, tie it up, and toss it in your pickling container (pro-tip: don’t use a colored spice bag unless you want discolored pickles. And hint: you don’t).
Need ideas for great spices to use? Try cinnamon sticks, chili peppers, mustard seeds, allspice, cloves, garlic, dill seeds or leaves, ginger, fennel seeds, or horseradish, just to name a few—the options are endless!
Be Sure to Be Safe: First things first—always follow the instructions carefully for a pickle recipe. Don’t change the amounts of vinegar, sugar, salt, or ingredients, not even to double or half them. And always use the vinegar, sugar, and salt specified. Not doing so could mean your pickles could spoil and become unsafe to eat. There are a million different recipes out there so if you don’t like the mix in the recipe you’ve found, you’ll be able to find one that’s suited to your taste!
When you go to start canning your pickles (should you decide to can them), make sure your jars and your utensils are sterilized to avoid contamination. You’ll also want make sure the rim of your jar is wiped clean before sealing it to ensure it’s airtight. Label and date your jars so you can ensure you’re eating your pickles while they’re still good! For more tips on canning, check out this helpful blog!
It should go without saying, but if there is any mold growth, don’t eat them! Throw the whole batch away without so much as a taste test. What you may not realize is that you should also be on the lookout for bubbles! If there are bubbles, that means air has gotten to it or bacteria is growing in it—either way, it’s no good! Again, skip the taste test, and throw the batch away.
Timing is Everything: There’s no magic timeline for pickling! And that’s kind of the fun part about pickling. Some may be great after three days and some after three weeks! It’s up to you to decide when they’re ready based on how tender and zesty they are. Just taste them periodically to check. See, we told you this was one of the fun parts!
Bonus Tip: If you’re not exactly sure how much brine you’ll need for your pickles, we’ve got a helpful tip. Fill whatever container you’re using for pickling with water. Then, pour it out into measuring cups until you have figured out how much you’ll need. Pretty smart, huh?
Now, if you’re feeling adventurous, it’s time to get pickling! You can make your own recipe or you can follow one of ours—though we thought it would be fun to share some pickled recipes that AREN’T cucumbers! Happy pickling!
