I just love a pretty table. It creates a wonderful point of conversation at dinner and really shows off the food that I work so hard to create. I have so many beautiful vintage table settings that gives direction to the look and feel of my table, but nothing pulls a table together like a gorgeous floral centerpiece.
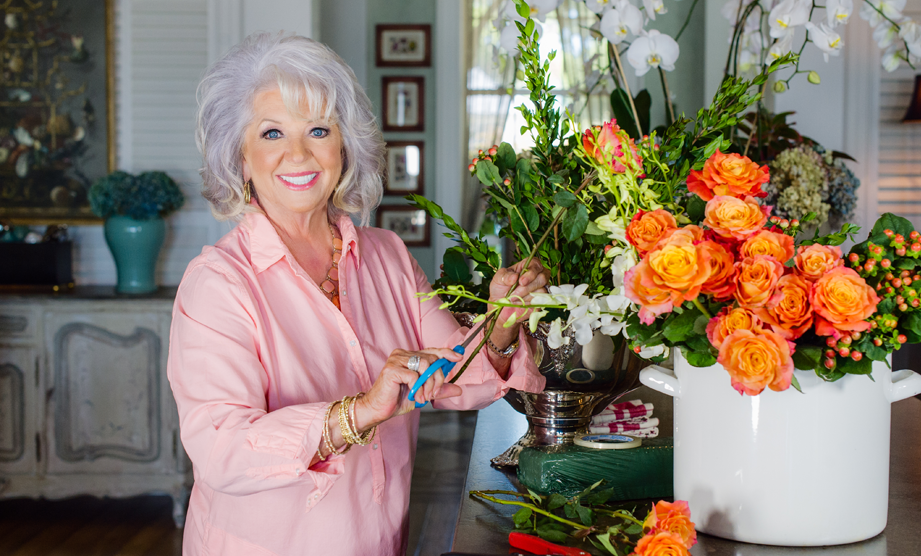
I like craftin’ a lot, and so does my assistant Eddie. So we are always makin’ beautiful floral arrangements. In fact, he makes some of the prettiest displays you’ve ever seen. So this week, I thought I’d share a tutorial so you can make pretty floral arrangements too. You never know when it will come in handy!
Before you start creatin’ your centerpiece though, you’ll of course want to pick the flowers for your display. You’ll want to start with some filler. You can often find filler in your own yard if you have nice, full shrubbery! Just look for something that’s full with good-lookin’ leaves. Fern stems make great secondary filler, too. For your flowers, you will want three to four selections. Find one flower type that you want to make the star of the arrangement. Many people opt for roses, lilies, or peonies; we used roses. Now find two or three smaller flowers that coordinate in color with your featured flower. I recommend either keepin’ the color palette the same and varying the shades or choosing colors that complement one another.

Step 1: Choose a container that’s right for your table. We used a large silver bowl.

Step 2: Set up a space to create your arrangement with clippers, floral tape, a pitcher of water, and a piece of floral oasis, which is that green foam you stick the flowers in.

Step 3: Soak the oasis in water in the container you plan to use, and use floral tape in a grip pattern over the top of the container. Space the grid pattern based on the flowers you choose. The tape will help keep the stems in place. Before you start adding in the filler and flowers, ensure the oasis has absorbed enough water.

Step 4: Trim some leaves from the lower portion of the stems, and begin arranging your container with your choice of filler. This is your base, so make it full enough to cover the interior of your container. Most people think this is the last step, but it’s important to start with a good foundation!
Step 5: You will want to cut your stems to different lengths as you are placin’ them into the arrangement. The various lengths will help to make a beautiful arrangement.

Step 6: Now start adding in your statement flowers. Space the flowers with large enough gaps that will allow the other flowers to fill in. You’ll also want to allow for the filler greenery or flowers to show as well. Be sure to step back as you work to see how the colors are workin’ together, as well as to ensure the shape of the arrangement is what you want.
Of course at the end of the day, this arrangement should match your style and preferences. There really are no hard and fast rules. You’ll be hard-pressed to find a bouquet or arrangement that isn’t beautiful because flowers are, in general, things of beauty. And like anything, it takes a little practice. You’ll figure out what works best for you and the look you like the more you try it!
Do you have any favorite flower combinations? Have you tried your hand at flower arranging? Tell me about your tried-and-true tips in the comments below! I can’t wait to hear them.
